
How to Square Ferrules for Quad Rods
by j.d. wagner
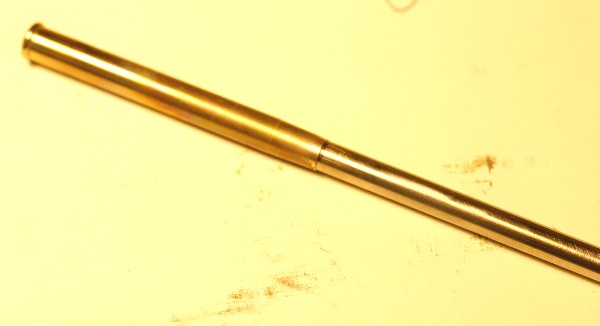
The following Tutorial shows our method for squaring ferrules for Quads using our Quad Broaches. Technically, they are forming punches and not broaches as they don't cut metal, but I'm going to keep the terminology. Why are quad ferrules squared? In our example, we'll be ferruling a rod blank that's .188 from flat-to-flat. If we used a round ferrule that would just slip over the unturned corners, it would need to be HUGE! The corners of a square .188 from flat to flat would measure .265, so we'd need a size 17 ferrule, which would clearly be too large for a light trout rod. What if we rounded the corners of the cane until it just formed a circle .188 in diameter so we could fit it with a size 12 ferrule? That would require removing about .080 of cane from the corners, which would weaken the ferrule station to an unacceptable level. So, squaring the ferrules provides a nice aesthetic touch plus allows you to mount a ferrule with a minimum removal of cane. There are some excptions and additional tricks to the method outlined below that come with the instructions to the broaches.
Background
If you use math to convert hex tapers to quad, the factor is .93 to get the same volume of cane in the quad as the hex. This works out very well when it comes to ferrule sizes. Say that your hex taper is .203(size13) at the ferrule station. For the equivalent quad, the dimension would be .203 x .93 = .1888 or a size 12 ferrule. However, the perimeter of a square is much greater then the perimeter of a circle of the same size (inscribed in the square). Therefor, you must use a ferrule that is one size larger then the quad taper calls for. This is because there is an insufficient amount of elasticity in nickel silver to allow you to drive a size 12 broach into a size 12 ferrule. The broach will invariably split the metal. You will need to use a ferrule one size larger than the quad taper calls for. So, in our example you'd use a size 12 broach and a size 13 ferrule.
The ferrules used for quads are CSE Step Down Non-Serrated ferrules. Step downs for quads are used for a variety of reasons. First, the females are made from 1-piece of tubing, which makes them easier to broach. The second is that the male slides are in easy-to-use 64th of an inch increments, which simplifies tooling. It should be obvious why non-serrated ferrules are used.
To get the crispest corners formed on the ferrules, I broach the ferrules with two sets of our broaches. The first is an unrounded broach two sizes under the ferrule size, the second is a rounded broach that is one size under the ferrule size. For most people, one set of broaches is sufficient. More on that later.
Method:
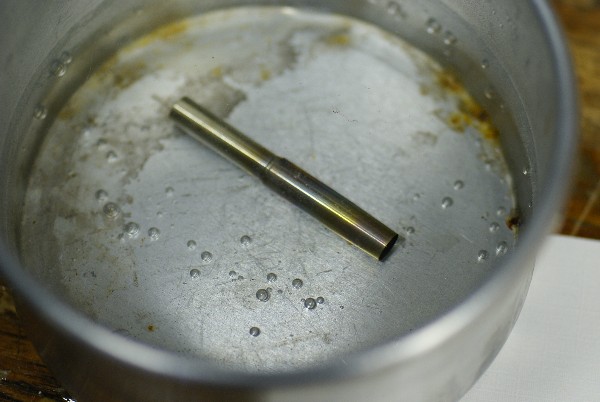
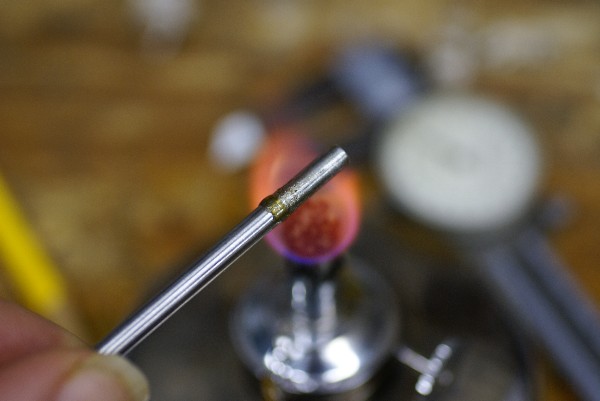
The first step is to anneal the ferrule to make it easier to broach. I hold the ferrule with forceps until the portion of the ferrule to be squared glows red, then quickly quench it in a little cup of water.
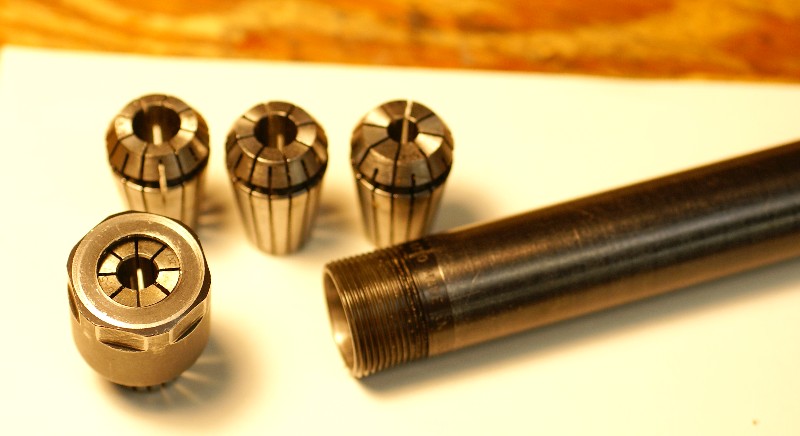
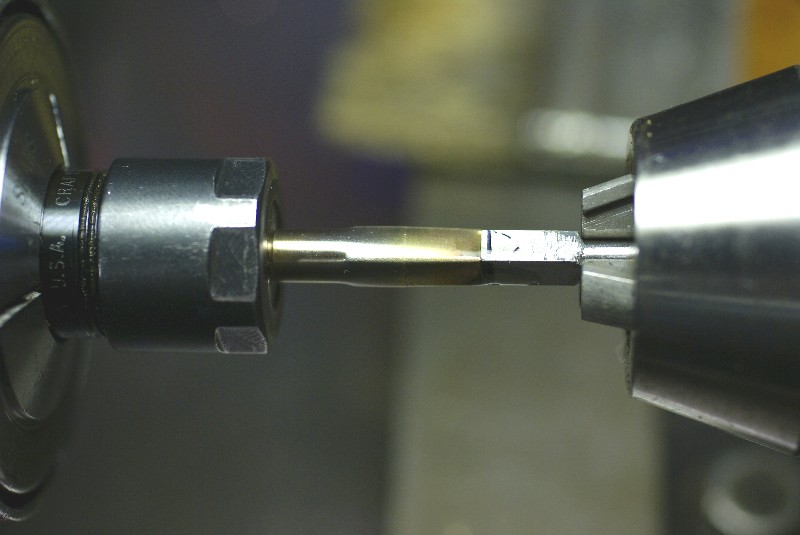
You need some way to hold the ferrule during the forming process. In the past I've used holders and split collars I've made from Delrin, but by far I've had best success using an ER16 collet and holder. ER collets are a type that allows a range of clamping sizes, so just 4 or 5 sizes are needed to hold all of the common ferrule sizes you'll ever need to hold. They also hold very securely., and clamp evenly along their length. Here's an ER16 collet holder with a ¾" hollow shank and various collets. I find these buggers invaluable for holding parts in the shop and well-worth the investment. The collet holder is in turn chucked in a ¾" collet in the lathe, but if you just have a chuck to hold it, that will work, too.
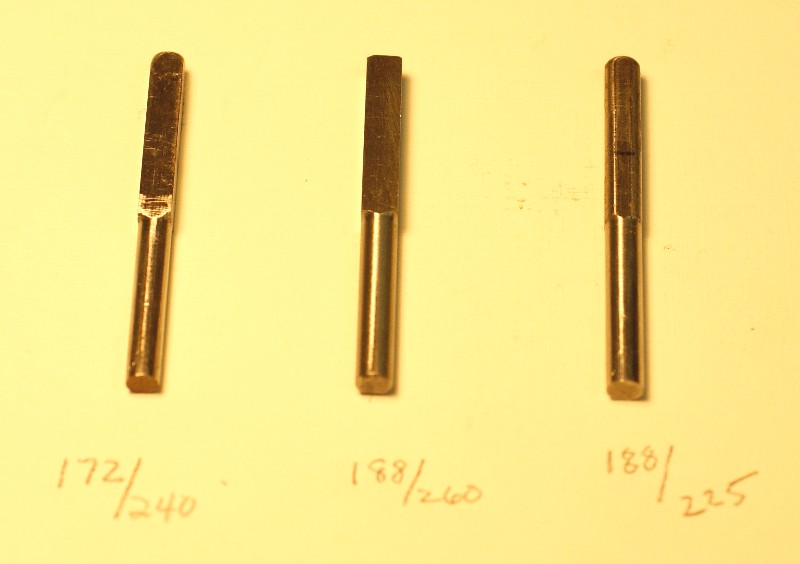
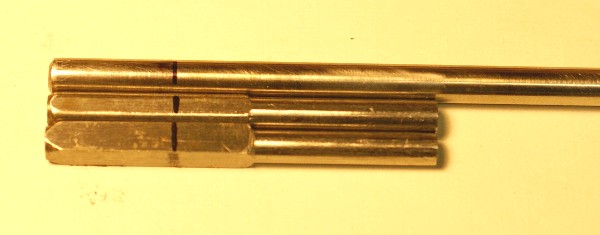
Before we go further, let's look at some broaches and how they are prepared. Below are the broaches we are going to use in this demo. On the left is an unrounded 11/64th broach. The flats of the broach measure .172, and the corners .240. On the middle is an unrounded size 12 broach, the flats of which measure .188 and the corners .260. Finally, on the right is a rounded size 12 broach, the flats of which are .188 and the corners rounded to .225. The middle broach can not be driven succesfully into a size 13 ferrule without splitting it, so it won't be used in this demo. Why will it split the ferrule? The area of a 12/64th square is: .188 x .188= .0353. The area of a circle of a 13/64th diameter is pi x r(2), or 3.141 x (.101)*2 or .320. Generally, if you own only one set of broaches it's best to round the corners so the corners measure about .040 larger than the flats. The corners of your ferrules won't be defined quite as as nicely as having two sets, but you won't split ferrules, either.
The end of the broaches are rounded gently in the lathe to facilitate entrance into the ferrules thusly:
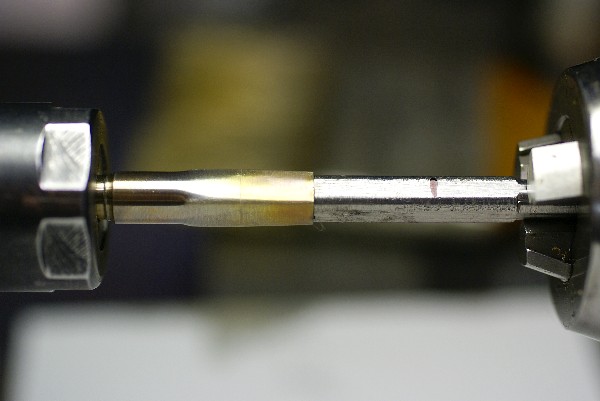
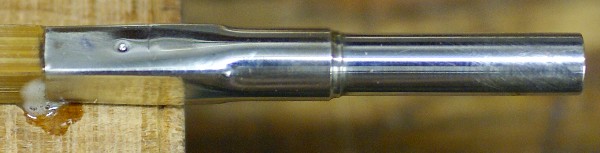
I'll do the male first in this example. The first step is to determine the depth the broach will penetrate the ferrule, which is down to where the 'step' of the ferrule begins. A ferruling mandril is inserted into the male until it bottoms out, and a magic marker mark is made on the mandril thusly:
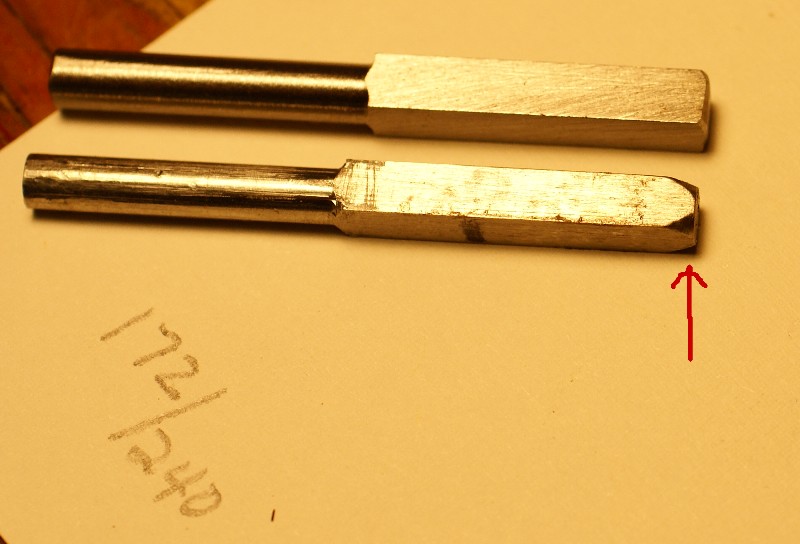
The mark from the ferruling mandril is then transferred to the punch(es). In this case, I'm going to use two punches, a size 11 with unrounded corners( TWO sizes smaller than out size 13 ferrule) to define the edges, and a rounded size 12 ferrule to open up the flats.
The male ferrule is chucked in the ER16 holder, the holder is chucked in the lathe, and the size 11 broach is mounted in a tailstock Jacob's chuck. A drop of oil on the broach will help smooth the process. The tailstock is cranked to push the broach into the male ferrule until it bottoms to the magic marker mark.

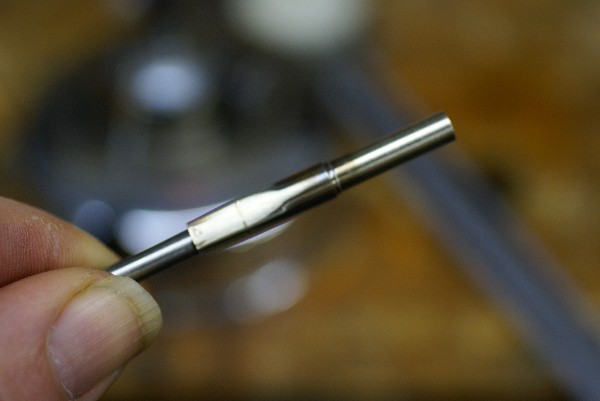
At this point the ER16 collet is loosened and the broach and ferrule removed from the Jacob's chuck and taken to the vise. My vise is lined with nickel silver sheet to keep the jaws from marring the ferrule in the next step. The purpose of this step is to flatten the 'flats' of the ferrule in the vise, which will cause the metal to conform to the sides of the punch and also make it much easier to remove the punch. So, the ferrule with punch still inside it inserted in the vise up to the point where the squaring ends, and the vise given a good tighten. The vise is opened and the ferrule and punch turned 90 degrees and the other pair of flats is flattened. Once this is done the punch can easily be pulled from the ferrule by hand.

If the punch can't be pulled from the ferrule, the assembly is rechucked in the ER16 collet, the punch chucked to the tailstock Jacob's chuck, and the tailstock chuck retracted to remove the punch.
Next is to stretch the metal a bit more to accommodate the flats of the cane, so I'm repeating the process with the rounded size 12 broach. It is introduced into the male, sqeezed in the vise and removed the same way as the size 11 punch.
Once the males are done, I do the females. The female can be broached all the way up to the moisture plug! Again, a mandril is inserted into the female to determine the depth thusly:
The female is held in the ER16 collet just like the male, except a ferruling mandril is inserted into the female end where the male seats to keep the ER16 collet from crushing the female ferrule. The steps of broaching are then the same as for the male.Once the males and females are done being broached, I next lap the male slides to fit the female. A ferruling mandril is used to hold the male on the ID of the step down portion of the ferrule. A little ferrule cement is heated and smeared onto the mandril and the mandril and ferrule heated and the male temporarilly mounted for lapping the male slide on the lathe.
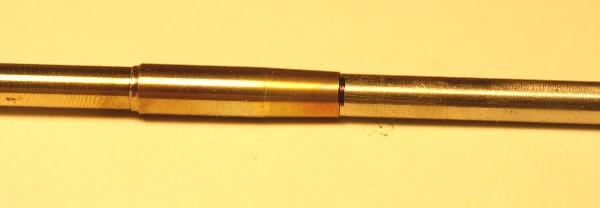
Once the males are lapped, it's time to fit the ferrules to the cane. The pic below shows the layout. The female is straight forward: the corners are turned to the corner dimensions of your broach(es). The flats of the cane are filed, if necessary, to fit. In our case, where I used an unrounded size 11 broach for the first step, the corners of that broach measured .240. This means I'll only have to remove .010 from the corners of the cane to fit the female and male ferrules that were broached. Had I used only the rounded size 12 ferrule, I'd have to remove enough cane to fit the .225 corners of that broach.
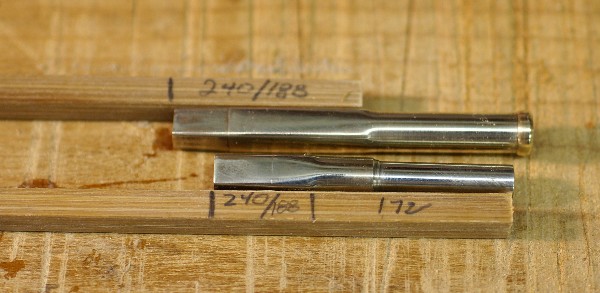
The males are turned to two dimensions: the first is to the ID of the step down portion of the ferrule. In this case it's .172, then the corners and flats are worked as the female.
The ferrules are then glued in place. Since we use an expanding glue to glue the ferrules on, I put a small dimple with a center punch on the tab to hold the ferrule in place while the glue cures. This dimple then serves as a mark for the pinning bitt when the ferrules are pinned in place after the glue sets. A final step is to hand file the serration tabs down to a feather edge where they meet with the cane.
Copyright 2012, J.D. Wagner, Inc.